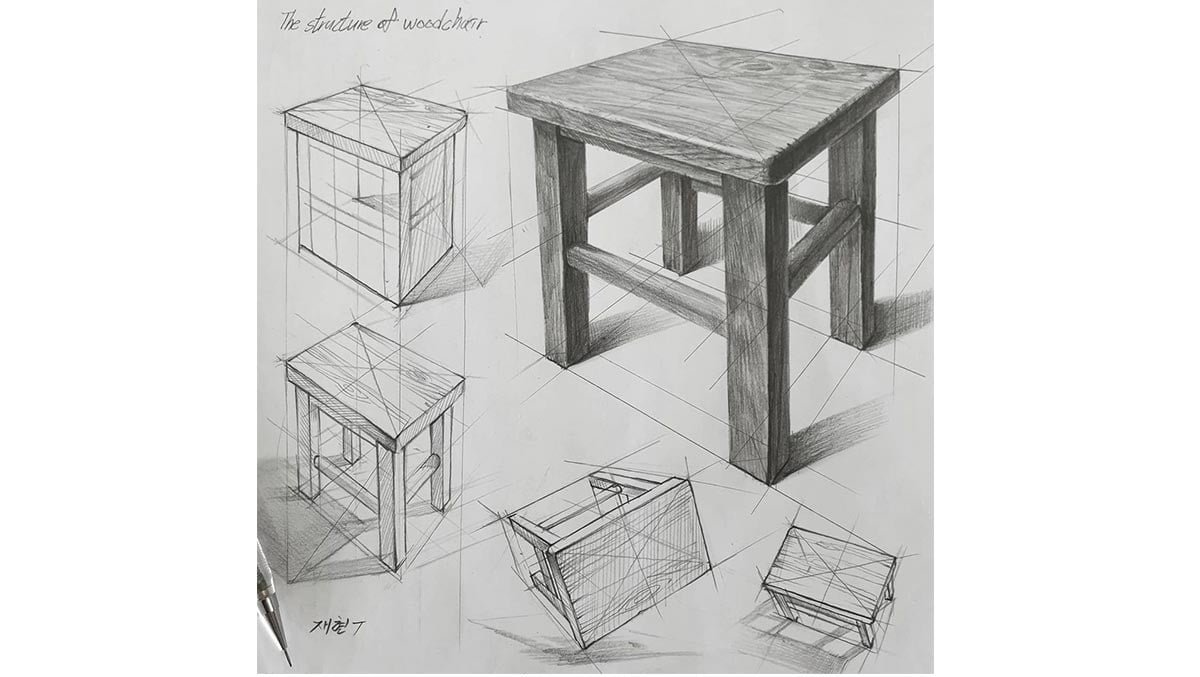
A two point perspective is a kind of linear perspective. When you use lines to create the illusion of space on a two-dimensional surface then that method is called linear perspective.
And when we talk about linear perspective, it is of three types:
The perspective method uses only one vanishing point that is placed on the horizon line, then it is called one point perspective.
The perspective method in which two points are situated on the horizon the line then is called a two point perspective.
And the perspective method uses three vanishing points that are placed on the horizon line, then it is called a three point perspective.
When you see two vanishing points from your point of view then it is called a two point perspective. Interior design and architectural drawings often use two point perspective drawings and can use for interior as well as exterior drawings.
The object can be arranged into a grid-like or geometric structure and it is done systematically then is a two point perspective.
As an artist, this is one of the smartest things you can do. You will be able to identify and draw the angles of the sides of objects make accurately and correctly.
How does the two point perspective works?
The very first step in a two point perspective is defining the horizon line (the line that divides the sky from the ground).
But when we talk about perspective drawings, this is the line that is implied and it is representative of the eye-line of the “line of the sight” of the viewer.
And when you have established the horizon line, then you have to go ahead by placing the vanishing points (it is the the point that is placed on the horizon line and the object begins to disappear because of the distance).
And two vanishing points are placed on the horizon line when we are considering a two point perspective. And to avoid distortion, these points should be spaced out from each other.
And then the next step is to draw the corner of the object. For example, when you draw a building, then this line could be the corner of the building. This like can even cross the horizon line and is drawn between the vanishing points.
And then in the next step, you have to draw the receding lines which are drawn from each end of the corner to each one of the vanishing points.
And when as a viewer, any set of parallel lines which are receding away, then it would follow along these lines, to one of the vanishing points, placed on the horizon line.
For the indication of where the building or the form ends, parallel, vertical lines are drawn. And when you placed these lines closer in space on either side of the vanishing points, the form would appear longer.
When overlapping of the horizon is done when the form is placed in that way, then to define the overall form of the object no additional lines are needed. And the additional lines are only visible when the object is placed above or below the horizon line.
And in the last step, from each end of the form, the orthogonals are extended and then it would be lined up with the opposite vanishing point.
Below the horizon line:
When the form or the object is placed below the horizon lime then the steps to draw the two point perspective remains the same but the top portion of the form is visible.
The top portion of the form which is to be drawn from each end to the opposite vanishing points, the orthogonal lines are extended.
Above the horizon line:
When the form or the object is placed above the horizon line, then the steps to draw the two point perspective remains the same but the bottom portion of the form is visible.
The bottom portion of the form which is to be drawn from each end to the opposite vanishing points, the orthogonal lines are extended.
Pencil and Chai Fine Arts Gurukul offer you the best courses to learn different types of perspective sketching. To learn more just enrol yourself to them!


